The idea/design goals
The initial (admittedly silly) idea was to be able to keep an eye on newly-resident kittens remotely, while not at home. Ideally on a mobile phone.
Despite the fact I run the niche-but-surprisingly-popular Webcams In Norway, I had never felt the need to operate a webcam myself before. So, I started doing a bit of research into what webcams would do the job. Main criteria were:
- Works on Linux
- Can be mounted on a ceiling fairly easily and without doing much damage
- Physically small and visually inconspicuous (so that it doesn’t look stupid attached to my ceiling)
- Not too expensive – this is a silly idea, after all
- Easy to get hold of
After a bit of looking around, it turned out that a common cam is one that comes under a variety of names including “(Microdia) Sweex Mini Webcam” and “Dynamode M6323”. It’s available online here in the UK for as little as GBP7 (about €10), although for convenience I picked one up from a local Maplin Electronics shop for about GBP15. These are tiny cams (about 3cm square) that have a cream case and are on a flexible metal pole (so you can plug it in and then adjust the position) with a USB connector on the end.
Drivers
The first thing to do was to get it working under Linux. Although lots of people seem to have had a bash at writing drivers, there appear to be two open source drivers that are reasonably complete:
Being built into the kernel and therefore already available, the sn9c102 was the obvious choice. However, I struggled to get it working initially: although plugging the cam in resulted in it being detected correctly (from syslog messages), I couldn’t find any app (xawtv, webcam, gnomeeting, motion…) that could get an image from it; they all failed mysteriously. (I later got to the bottom of this; read on). So I had a bash with the spca5xx driver which seemed OK (all the apps could get an image from it) but a bit dark (I later found this was due to the drivers reading from the cam in “compressed” mode which has a higher frame rate but darker pictures)
Coming back to the snc9c102 driver, it turns out that although the driver is a standard Video4Linux 2 driver, the cam has some kind of weird “colour system” (I’m not an expert here so I don’t really understand the deep technical details) and hardly any apps support it. However, there is a patch (provided by the author of the sn9c10x driver) in the contrib/ directory of xawtv which adds the necessary support to xawtv. (I don’t really understand why it’s not been applied to the main xawtv distribution). With this patch in place, the xawtv “webcam” application then works fine. (The main xawtv app still doesn’t seem to work, and I don’t know why, but I didn’t really care)
Physical mounting
With the software side of things working, it was time to think about mounting the cam. Now, I wanted to install this thing as tidily as possible and with the least material damage to my house, so I didn’t really want to make a hole in my ceiling large enough for a USB connector to pass through. So, as an engineer the natural first thing to do was to dismantle the cam to see what was inside (engineers like dismantling things); the plastic case just clips apart easily revealing the PCB and actual camera inside:
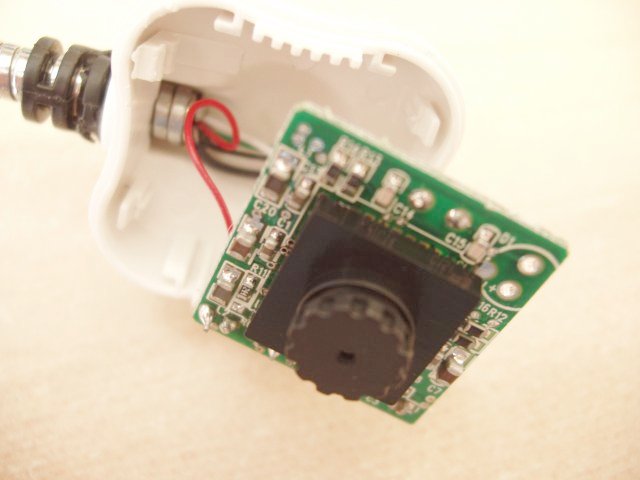
The flexible metal post is attached pretty firmly to the rear of the case; you would have to cut the plastic case (probably slightly tricky to do without completely trashing it) to separate the two.
In order to keep damage to the house to a minimum, I wanted to just drill a tiny 2-3mm hole in the ceiling. So, I decided my best course of action was to de-solder the incoming wires from the cam PCB, attach a fresh (long) set with loose tails, feed these through the ceiling into the loft, and reconnect them in the loft to the back of the cam and hence the USB connector. (Actually, it would be nice to completely get rid of the metal stalk and rear of the cam case, but I don’t know of anywhere that sell USB connectors you can easily solder/crimp to loose tails, so I needed to keep the original stalk just for the USB connector attached to it).
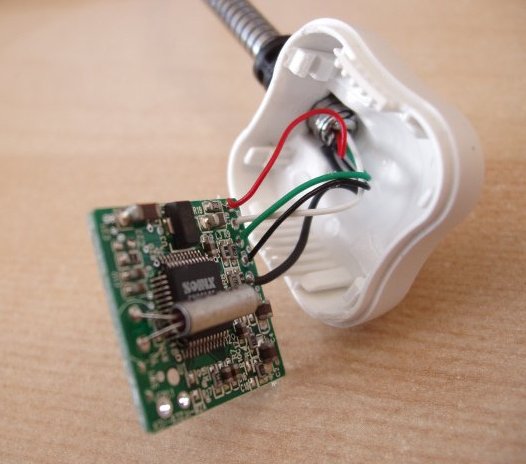
It didn’t take very long to de-solder the wires and attach a new set of long (approx. 30cm) loose tails (I just used some telephone wire I had handy):

The main cam PCB with the fresh set of loose tails
The next thing was to attach some terminal blocks to the loose tails now coming from the rear of the cam housing, so that the cam can be easily connected/disconnected above the ceiling.
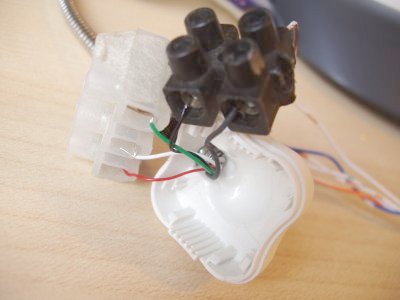
Rear of the cam housing, with the loose wires coming out of the flexible stalk connected to terminal blocks
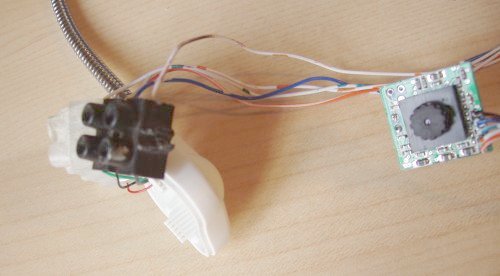
Now is probably a good time to get an overview of what we have achieved – below you can see the cam PCB and the rear of the cam casing, connected by a long set of loose tails and a terminal block:
Now all that remained was to:
- attach the front plastic plate of the webcam to the PCB, with sticky tack
- push the loose tails through the ceiling
- attach the cam to the ceiling, with sticky tack again
- connect the loose tails from the cam (above the ceiling) to the terminal blocks that are connected to the rear of the cam and the USB connector
- run an active USB extension from above the ceiling, connected to the cam’s USB connector, back down the centre of a convenient wall (stud walls are great)
- cut a hole in the wall (stud walls are great, again) and install a wall-mounted USB socket
- connect it all up
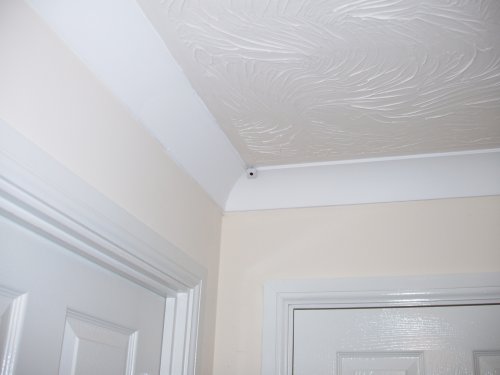
Here’s the finished look:
Configuring the xawtv ‘webcam’ app
With the hardware in place, final configuration of the software was easy. Here’s what I used for my .webcamrc:
[grab]
# I already have a video device on my machine, so the cam becomes /dev/video1
device = /dev/video1

# input was "USB" on older driver versions
input = Camera

# This is the cam's only supported capture size
width = 352
height = 288

# some text for the image
text = CatCam 1 %Y-%m-%d %H:%M:%S

# Capture image every 0.5 second
delay = 0.5
wait = 0

# JPEG quality for saved images
quality = 75

# Rotate the image to make it "portrait" (this suits the position of the cam)
rotate = 3

# Put the image in /path/to/webdir/webcam/webcam.jpeg
[ftp]
local = 1
dir = /path/to/webdir/webcam
file = webcam.jpeg
tmp = uploading.jpeg
End result was a regularly-updated JPEG image of cat cuteness accessible over the web (I already had a local web server set up and running using Apache HTTPD):

Adjusting the gain
The above worked great – when the light was at the right level. However, the cam doesn’t seem to have a built-in automatic gain control (AGC) so as soon as the light gets brighter or darker, the picture gets either dark or washed out. The ‘webcam’ app doesn’t seem to let you adjust the cam’s gain, especially once it’s running, so I needed to find another way. Turns out the sn9c102 driver sets up a sysfs interface that gives you low-level access to the cam’s internal registers, one of which controls the gain. Thus, the following shell commands (with appropriate permissions) let you set the gain from the command line:
# tell the driver that we want to write to register 0x20 (which is the gain register)
echo 0x20 >/sys/class/video4linux/video1/i2c_reg

# write gain value ZZ to the register
echo 0xZZ >/sys/class/video4linux/video1/i2c_val
ZZ is a hex number containing the desired gain.
A simple web interface in PHP allows the gain to be adjusted remotely via a web page.
Recent driver versions
Note that with recent versions of the driver,
- sysfs support is not enabled by default – you have to compile the driver/kernel with CONFIG_VIDEO_ADV_DEBUG. I’ve written a patch that allows the sysfs interface for the sn9c102 driver to be turned on and off at module-load time via a module parameter called ‘sysfs’.
- I found it necessary to pass the parameter “frame_timeout=1” to make the ‘webcam’ app work (otherwise it fails and you get syslog messages saying “Video frame timeout elapsed”
Conclusion
That’s about it. All the initial goals were achieved and remote cat monitoring is possible from anywhere in the world, using either a desktop PC or a mobile phone with GPRS and a basic web browser. Although I used this for cats, I suppose it could be a good general security device.